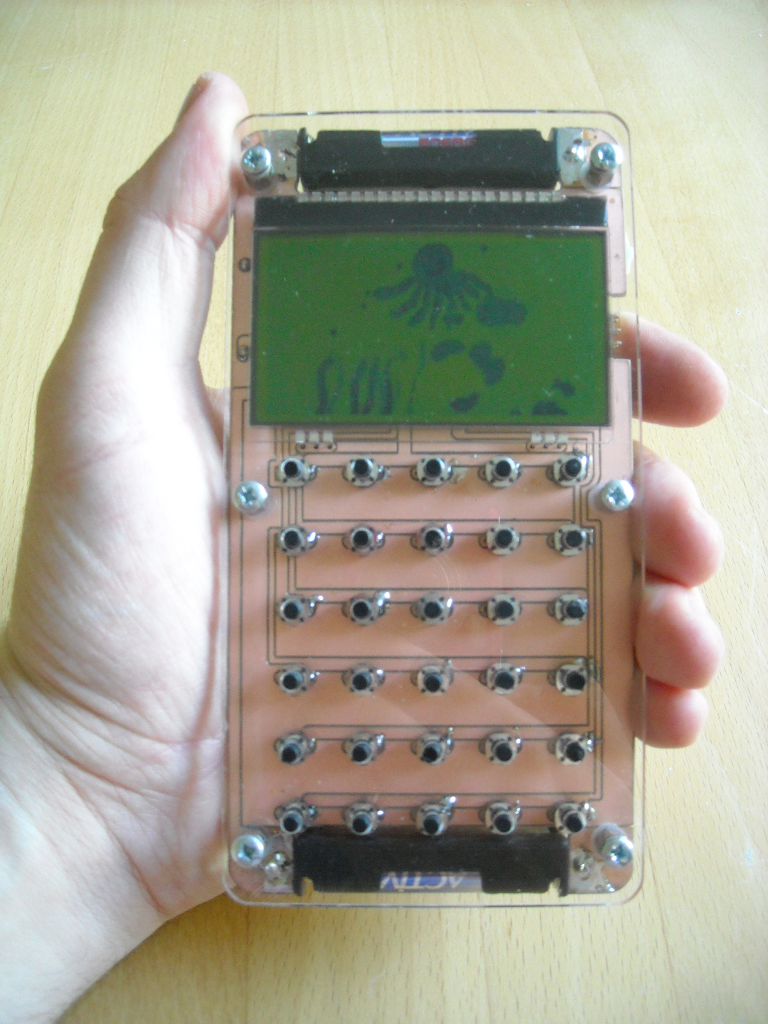
The first calculator hardware (RevA) has been built and it works! My daughters actually soldered most of the main board. I found a couple of bugs and design flaws, but nothing that couldn’t be fixed. Here are some pictures:
The buttons I’ve used are not meant for top side soldering. This made the the assembly unecessary difficult. RevB will contain vias and the leads of the buttons will only be soldered from the bottom.

The calculator is about 18mm thick. Right now I’m using a reflective LCD (EA DOGL128L-6), which fits right in the available space. If I will aver add a backlight, I will need to move the MCU board underneath the keyboard.
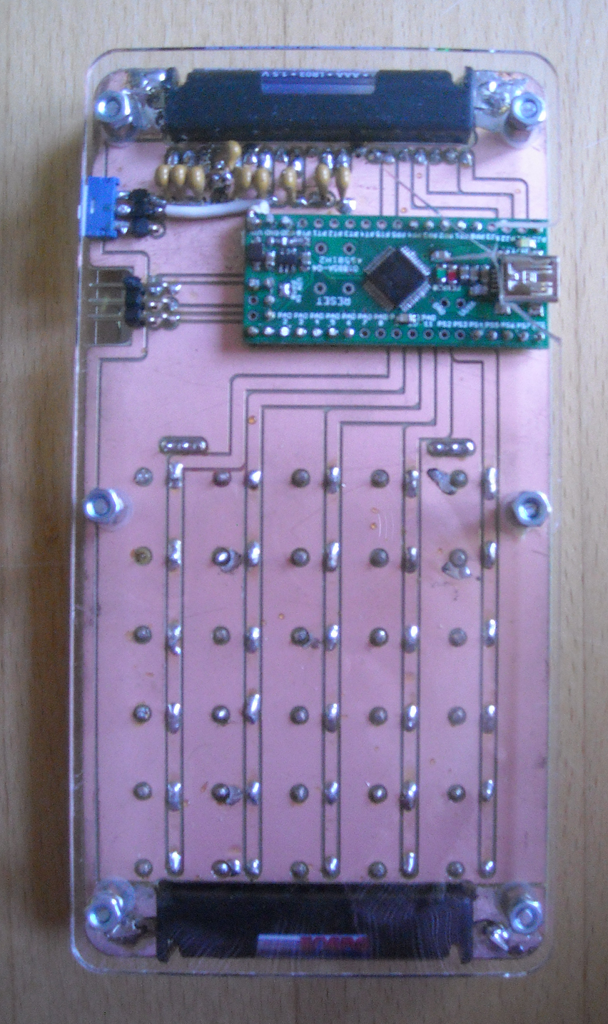
The back side shows most of RevA’s problems. The MCU’s supply is not connected, one of the LCD’s capacitors is connected to VBat instead of GND, the pads of the on/off switch are not close enough to the edge of the board, and the back cover doesn’t have a cut out for the USB connector. I broke my back cover trying to cut it out manually.
All bug fixes and design improvements have already been applied to the RevB design. However I don’t plan on building RevB for a while. For now I’ve got a working hardware that I can use for software development.