ColorPanel is a decorative mood light.
Hardware
The hardware consists of a 50cmx50cm IKEA RIBBA picture frame that is lit up by WS2812b LED strips. The RGB LEDs are controlled by a S12G-Micro-EVB board.
Software
The software for the ColorPanel will be written in Forth.
Latest Updates:
12 Dec 2015 - Cut the LED Strips, Don't Unsolder Them
All of my WS2812B LED stips came in segments of 50cm which were soldered together.
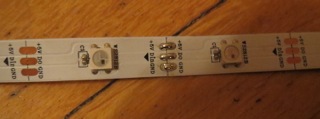
Since this is exactly the length I need, I decided to unsolder them. After struggling with a
soldering iron for a bit, I started using a hot air gun. This worked fine on one manufacturers
LED strips. When I switched to the LED strips from another manufacturer, I ended up
unsoldering LEDs along with the joints.
This is not a problem because I can just solder them back in. But there were tiny 402 size bypass
caps next to the LEDs which are now lost forever.
Next time I will just cut the strips and leave those joints alone.
11 Dec 2015 - From Squares to Dots
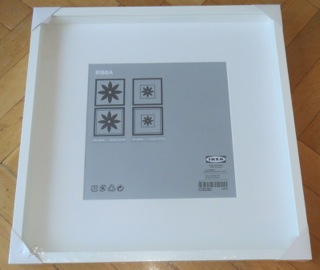
My original plan for this project was to build an animated wall mounted light, which would look like
this:
A 50×50cm2 panel with 15×15 square pixels which can be lit up in multiple colors. The panel was to
be build upon an IKEA RIBBA picture frame
with a white spray painted glass front that is lit up by WS2812b LED strips.
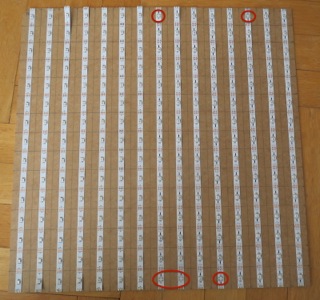
To shape the square pixels, I had planed insert a mesh of cardboard dividers into the inner frame of
the RIBBA. This mesh consists of 14 horizontal dividers (50cm by 2.6cm → the depth of the RIBBA’s
inner frame), and 14 vertical dividers (50cm by 2cm), which are a little narrower to leave room for
the LED strips.
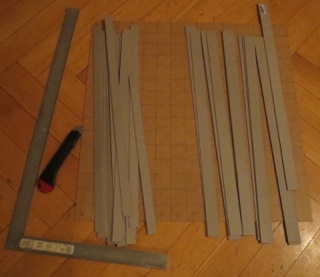
The I used a jigsaw to cut notches in into the inner frame and the dividers, to be able to stick all
pieces together.
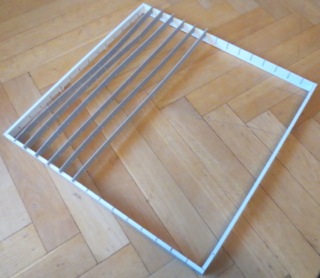
Here I made two mistakes:
- Instead of marking and cutting out all 196 divider notches individually, I bundled the dividers
and cut them with a jigsaw. This approach could work in principle, but in my setup the vibration
of the saw and the weight of the clamps made the dividers bend while sawing.
This caused the notches to be shifted between the various layers of the divider stack. - The LED strips fit exactly the width of the picture frame (50cm).
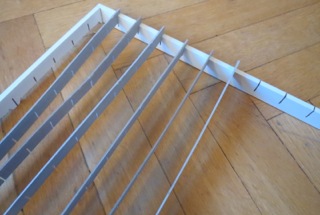
I didn’t want to cut off the end contacts of the LED strips, so I cut the inner frame a little
narrower at the top and bottom side. This is not a good idea, since this weakens the inner frame.
My inner frame broke apart. It is much better to cut the LED strips a little shorter to make them
fit inside the inner frame. The end contacts of the LED strips are not important. Wires the data
signals can be also accessed at the pads of the LEDs
The frame didn’t turn out well. The pixels are not really square. I’m going to toss it.
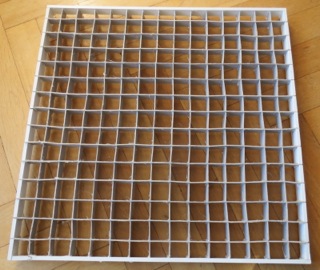
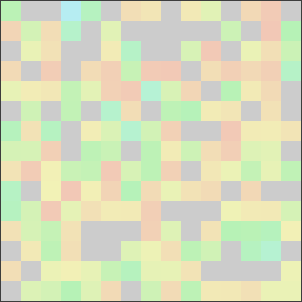
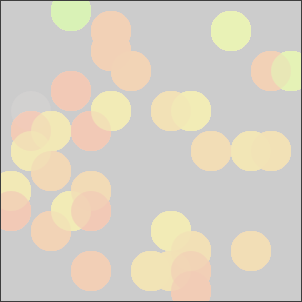
I don’t want to build another divider frame, so I’m going to see how the project looks without one.
The LEDs have a viewing angle of 120 degrees and they are 3.3cm apart.
The distance to the glass front is approx. 2.4cm, so the LEDs should produce overlapping dots of
4.2cm. So the Color panel might look like this in the end:
22 Nov 2015 - ColorPanel Project Started
ColorPanel is a new project that I intend to build over the next months. The hardware is simple. It’s an 50cmx50cm picture frame, lit up by WS2812b LED strips. The LEDs are controlled by a S12G-Micro-EVB board, running S12CForth.